Showing posts with label Hairstyles. Show all posts

February 8, 2011

Rapunzel, Rapunzel, let down your hair...hairstyle #6

Similar to hairstyle #5.  With this hairstyle, part the hair in half, then into about 2 1/2 inch sections on the right and left of the part on the top of the head.  Starting with the right side, top section, divide it into a square section and begin twisting until there is a little "bump", then divide the next area into another square and begin twisting it adding the first section of hair until it has another little bump...then on to the third section twist it all together into one strand.  Continue twisting toward the back of the head and gather with a claw while you repeat the process on the left side of the head.
Take the two twisted sections and add it to the remaining hair forming a ponytail at the back of the head.  Join it in  a rubber band.  
This bun was formed by dividing the pony tail hair in half and twisting each side separately, the same direction, then joining the two sections going the opposite direction (a twist) then wrapping that loosely into a bun which is gathered with clear rubber bands and a ribbon tied around it.  
Love it!


Visit shabbyfarmer.com to see what to do with your "junk".

You can contact me at farmer.laurie@gmail.com or on facebook or twitter


February 3, 2011

Rapunzel, Rapunzel, let down your hair...hairstyle #5

Farmer's Dozen - Hairstyle #5
Hairstyle #5 is really simple but looks so unique!  Divide the hair into 2 sections, making a part across the top of the head from one ear to the other.  Gather the back section into a hair-band to keep it out of the way.  Take the front half and divide into 3 sections making ponytails with small clear hair-bands.  Make a tuck into each ponytail.  Divide the ponytail in half and begin to twist each strand.  As you twist take it across the head to a random spot in the back of the head.  Using a claw attach that section.  Twist another section and attach again with a claw.  Do this to all 6 sections.  
Farmer's Dozen - Hairstyle #5
Once all 6 sections are gathered, gather all the hair together into one ponytail at the base of the head and tie a ribbon bow a flower.  
Farmer's Dozen - Hairstyle #5
A close up of the twisted sections.  
Farmer's Dozen - Hairstyle #5
The finished product...easy!

Visit shabbyfarmer.com for decorating with antiques in your home!

February 2, 2011

Valentines Day - Valentine Ideas and a Hairstyle

This was last years hairstyle on Valentine's Day.  Creating a heart with a red ribbon and joining it all into one ponytail with a hot pink ribbon bow.  To do this hairstyle, I made a part from the top of one ear across, to the top of the other ear.  I gathered the top section into a pony tail and did a tuck, forcing all the hair in the ponytail, back up behind the hair band (parting the hair above the hair band) and pulling the ponytail through the parted hair.  I tied the red ribbon around the hair band.  Dividing that pony tail in half I did a twist, including the ribbon in each twist and formed a heart.  I then joined the bottom of the heart with the remaining hair and formed a pony tail.  I added a great big bow on this ponytail with the red ribbons hanging down with the hair.  
We apply heart stickers to the face, she didn't choose to have very many this year, we usually do more!  Then when people question why she has hearts on her face, she says "I have "Love Pox", watch out it is contagious".  
I made felt hearts with little slits in the center of them.  Slip the hearts over any and all buttons on the shirt.  Uniforms are worn at our school which limits the colors to a grey, black, white or orange collared shirt.  Adding any bit of color is always fun!
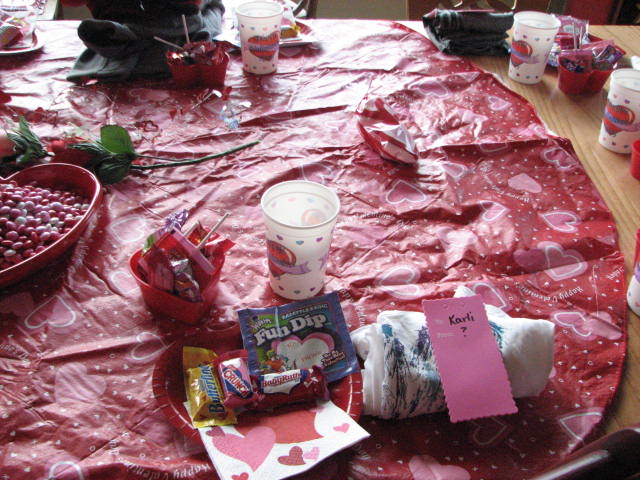
This is our table last year.  After the kids are in bed the table is decorated.  Foiled hearts on the window, heart tablecloth and anything else on top.  Silk flowers, heart glitter, heart serving platters and valentine table settings. 
Valentine M&M's, valentine candy in little heart containers are placed by each child's spot, along with a little gift.
A drop of food coloring is placed in the glass so that when the milk is added the milk magically turns pink!

Fun things I did in years past to make Valentine's fun for my family....

~ Decorate the kitchen table in a valentines tablecloth, pink and red silk flowers in the center, heart confetti, hearts on the window behind the table, valentine plates, napkins and cups.

~ Cook heart shaped, pink pancakes with valentine m & m's cooked in them.  A glass bowl full of powder strawberry milk mix to add flavor to the milk and another glass bowl of Valentine goodies in the center of the table.


~Place a little drop of red dye in the bottom of each cup so the milk magically turns pink.  

~ Send children to school with little heart stickers on their faces and a sign that reads "I have Love Pox's, watch out it is contagious."

~ Put pink and red ribbons in the hair and little felt hearts with a slit in them to slide over all buttons, so there are red hearts all over the sweater.

~ And of course red fingernail polish with hearts and glitter over that.

~ For dinner I spaghetti, red, heart cookies that were already formed and ready, just had to cook them.... 

~ I have met with two other friends and we would each bring a couple of ideas and supplies and all to make enough items for our children for the 14 days until Valentines day (beginning the gift giving on Feb. 1).  Then we would do "something" each day.  One idea was, we drew our silhouette on butcher paper with our arms straight out perpendicular from our body.  We blew up a picture of our face in black and white on a copier and glued it on the silhouette.  In the middle (stomach area) we wrote..."a hug from mom be my valentine" and then folded it all up real small.  We then put it in their lunch for the child to unfold at school in front of everyone.  I have a bunch of funny ones...one is a giant nose with 2 nostrils, drawn on card-stock and it says I "Pick" you to be my valentine, and then that rubber cement type glue in a glob in the nostril with a little slit and a sign that says pull here and as they pull it is connected to a folded dollar...very funny....

~ Play "HEART" (Bingo) using valentine m&m's as markers.

~ For dinner you can make a heart shaped pizza (go to Papa Murphy's and buy one....they sell heart shaped pizza's on Valentine's Day)...or, use a heart shaped cake pan to make a meatloaf.  Add a special drink "Cupids Delight" Cherry Float, cherry 7-up, vanilla ice cream, whipped cream and a maraschino with a cherry on top.  Heart decorated cupcakes...and dinner is served :)...

Write all of the following on red heart cut outs:

(in his sock drawer)...You charm the "socks" off me
(undies)...I've got you "UNDER" my skin
(by the light switch)...You "light" up my life.
(Boat floating in sink)...You are my dream "BOAT"

Or consider the following treat/gift ideas:

(gum) I "chews" you to be my valentine
(chocolate kisses)...you've been kissed
(Hugs)...you've been hugged....
(kisses and hugs) from me (mixed hugs and kisses)
(Heart shaped glasses): I can "see" clearly now you are my valentine.  It's going to be a nice sun shiny day.  "Love" glasses
(toilet)...Hey poopsie, won't you be my valentine....with whoppers...
(safety pins)....I'm stuck on you
(rootbeer) "soda ya think you'll be my Valentine?  I'm "rooting" for you to say yes...
(life savers)...you are a life saver, be my valentine

January 31, 2011

Rapunzel, Rapunzel, let down your hair...hairstyle #4

A cute easy hairstyle!  I used a comb and created a zig-zag part from the front/top all the way down the back, dividing the hair in half.
I created 2 low ponytails, which I then wound into 2 tight buns with their ends fanning upwards, securing the buns with a few clear rubber bands.  I then added 2 coordinating ribbons, each with a different pattern, tying them each into a bow.

For more hairstyles go to:
http://www.princesshairstyles.com/

Please visit Shabby Farmer for decorating ideas.

January 27, 2011

Rapunzel, Rapunzel, let down your hair...hairstyle #3

Farmers Dozen - Hairstyle number 3
Hairstyle number 3 was fairly easy.  You start out by dividing the front of the hair, from the back.  I put the back section in a ponytail, just to keep it out of the way.  Then divide the front section in half.  Front section being from front of ear to front of opposite ear, then divide that section into thirds.  Each of those thirds you twist individually.  Place the large ribbon across the head and under each of the twisted sections.  Then grab the remaining back half of the front section which was left out of the pony tail and add each of those thirds, to the twists.  Keep twisting toward the back of the head.  Join all 3 twists with a rubber band.  Take out the ponytail and make one big pony tail, including the 3 twists and the loose hair at the back of the head.  Then I just took sections of hair from the pony tail and made a large messy bun using bobby pins.  Tie the ribbon at the base of the head.
Farmers Dozen - Hairstyle number 3
View from the top of the head
Farmers Dozen - Hairstyle number 3
A side view of the hairdo.

To see more cute hairdos this blog is a good one:

http://www.princesshairstyles.com/

January 24, 2011

Rapunzel, Rapunzel, let down your hair...hairstyle #2

Farmer's Dozen - Hairstyle #2
Hairstyle #2 - again I will give credit for my ideas to this blog:
This was a fun hairstyle, starting out with 4 sections of rubber banded hair, then splitting each in half ending in 2 rubber banded sections.
Farmer's Dozen - Hairstyle #2 top view
Then ending up with one section.  I weaved a wide ribbon through the front and placed a bow on the back ponytail. 
Farmer's Dozen - Hairstyle #1 front view
Front view, so cute!

January 21, 2011

Rapunzel, Rapunzel, let down your hair...hairstyle #1

Farmer's Dozen - Hairstyle #1
I love doing hair.  I once wanted to be a beautician and cut hair.  When at college (not for cosmetology), I made posters and passed them out, advertising and offering cheap haircuts.  I confess I mostly advertised at the boys dorms.  But hey, it was a way to earn money and meet boys?  As a mother, I have been blessed with 8 girls "heads of hair" to play with.  I am down to one however that will let me and I am keeping her hair long, for as long as I can!  I do the boys hair daily too, but not much to do there!  I will create some posts on hairstyles that I have tried on Claire.  I got most of my ideas here:
once you go there you will be hooked.  She has SO many ideas and she has videos to show the basics. 
Farmer's Dozen - Hairstyle #1 left side
The children are required to wear school uniforms.  The school colors are orange, black, white and grey.  Halloween colors!  So we focus on the hair and add color and pizazz there when we can.
Farmer's Dozen - Hairstyle #1 right side
Here is the right side and what it looks like.
Farmer's Dozen - Hairstyle #1 back
Slowly going around the head, showing the back.
Farmer's Dozen - Hairstyle #1 left side
This is the left side, ending with a messy bun and a bow.
Farmer's Dozen - Hairstyle #1 front
This shows the left side and the front.
Farmer's Dozen - Hairstyle #1 top
Ending with a top view and some twists.  I love doing twists.  They are easy and I like the way they look.  Try it!