January 11, 2012


Christmas 2011


Our yearly "Santa Picture".  Sure is a lot less work than it has been in the past.  We usually take a picture of each child but around the age of 12 or 13 we stop doing that...so that only left Claire and Kade with personal pictures with Santa.
Claire
Kade

This year instead of a certain "color" we went for "scarves" as the matching item of clothing.  What a fun Christmas Vacation we had.  All the girls from BYU came home and spent several days with us.  We sure enjoyed having them here.  Too bad we can't freeze time and keep them all gathered in our home.  Pretty soon they will be married and we will be sharing Christmas with their own families and the in-laws.  Sure do love all my children and being their mom!

April 21, 2011

Saint Patrick's Day

St. Patrick's Day in Fruitland looked like this.  Claire's hair turned into a green shamrock.
I made three of the hearts that I had done in her hair for Valentines Day and joined them in the center to make a Shamrock.  I imagined it in my head the night before!  You begin with 3 tucks in the front three sections of the head.  Tucking from the bottom going up.  Tie a green ribbon around the hair band.  Divide the hair at the hair band into two and twist each side including the ribbon and then join the two sides in a hair band.  Repeat 3 times and join all 3 ends together, tie loose ribbons together.  Join rest of hair with a hair band into a pony tail
View from back.
View from side.  Along with green earing and green necklaces.
This little guy was a leprechaun.  We must dress in school uniforms and green is not one of the colors.  So he accented his "white collared shirt" with a sparkle green bow tie.
Goofy face...He said the day before "St. Patrick's Day is my favorite holiday"  Really?  I mean Christmas?  Halloween?  He seemed to be excited about the "pinching"...he is ALL boy.
The morning began with a green table with green and gold little candies and green gum.
This cute tag came from this cute site http://stpatricksday.tipjunkie.com.   The bag has a foiled shamrock in it also.
Placed at the bottom of the cup is a tiny drop of green food coloring.
Down the center of the table are gold covered chocolate coins and shiny shamrocks.
For breakfast the pancake batter was green.  I usually use green m&m's  in the pancakes, but I forgot this year.
The cool whip mysteriously turned green.
The pancakes looked yummy with green sugar on top.
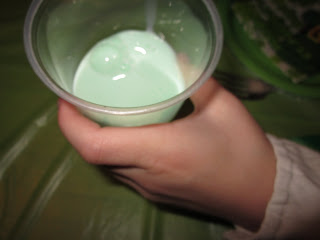
It is magic, the milk turned from white to green.
Got green milk?
Front view of Claire.  Black uniform shirt, green neclaces and green shamrock stickers with sparkly gems in the center placed on her.
 I left out of town before dinner, but left dinner for when the masses were ready to eat.  For dinner the pasta was dyed green.
Green pasta and green salad?
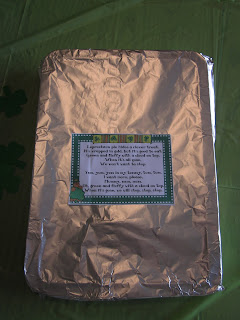
In the center of the table was a wrapped treat with a little note on it.
There was cool-whip or icecream to place on top, both had mysteriously been dyed green.
Brownies were the treat.  Baked in the brownies were coins wrapped in foil.
See the coin off to the right?  Brownie with green cool-whip...
Brownie with green ice-cream...

April 19, 2011

Vacation Organization

When we go on a family vacation, these days I only have 3 children I pack for (out of 10).  I begin the preparation process by coming up with the outfits for each child.  This trip to Utah for Spring Break was for Thursday through Sunday and a swimsuit in case!  I picked a shirt, pants, socks, undies and for the girls I add bows and rubber bands for each day.  Sunday of course was Sunday clothing also.  This is the BEST way to pack when someone is watching your kids.  This helps the child know what to wear, helping them to be able to get ready easily on their own and helps the babysitter to not wonder what goes with what child or which shirt goes with which pants.  
I use duffel bags to pack in, like a file cabinet.  There are 3 rows one for each child and the clothes are in chronological order front to back.  
I use gallon size bags, although Alek is 12 now and a little big for a gallon size bag, but it works just unzipped!  The bag is labeled with a Sharpie with the name of the child and the day to wear the outfit.  This also helps with coordinating outfits between siblings...when the triplets were little I could color coordinate outfits to match each day.  For these guys, one day I had all BYU gear for them to wear. This makes less thinking during the vacation!..
This is happy Kade in his p.j.'s, grabbing his bag to get dressed.  See how excited he is!
This is what was in the bag, pants, shirt, undies and sock!  (and Kade's foot standing on Lindsay's bed)...oh Kade!


At the end of the day, I gather all the dirty clothing in a big trash bag that I bring along.  Then on the last day, I place the full trash bag in the empty duffle bag.  I place all the shoes in one bag, entitled "The Shoe Bag".


Organization, the key to making vacationing easier!

March 4, 2011

Valentine's Day

I already did a post on what we do for Valentine's Day so I thought I would share some pictures from this year.  The above picture is Claire's hair this year for Valentines Day!
Claire's Love Pox "Watch out they are contagious."  There are stickers on her forehead, cheeks and two stickers on her glasses also.  Little hearts were painted on Claire's fingernails.
This year instead of little red dye drops, we had Strawberry Quick in each cup.
Turned the milk pink and yummy.  
The table...each child had a gift beside their plate...There are sales everywhere the beginning of February.  Cute shirts for $3.00 at Rue 21!  Walmart clearance for the little kids...Perfect...Claire and Kade had valentine parties at school that we attended.  Fun filled Valentine's Day.  


Visit shabbyfarmer.com to see what to do with your "junk".

You can contact me at farmer.laurie@gmail.com or on facebook or twitter


February 24, 2011

The last day of basketball

  
The Saturday before last was the last day of basketball season!  And what a day!  We had nine games with the potential of eleven!

Emma's game was where the excitement was!  Emma began her first game at 8 am in Marsing, an hour a way out in no where.  Her first game was a back and forth, intense game ending in overtime with a win.  The next game was 15 minutes later against their rivals, they had lost to this team the week before by one point.  This game was intense too.  Back and forth with the crowd going crazy!  I was at Claire and Alek's game so I missed it.  Homedale was ahead most of the game.  I received a text when there was 58 seconds left and we were down by 3.  I told Alek, Emma's team had lost when a few minutes later Rick called and said that Emma shot a 3 and tied the game!  She then had an amazing pass to her teammate Brooke who was fouled.  Brooke shot the first and missed, shot the second and won the game by one!  So exciting just because it was Homedale who is always their challenge!  Emma's team played again after a lunch break against a team who had not even played any games yet!  This was back and forth again and they lost by one!  This meant they again were to play against Homedale again!  A bunch of us jumped in the car and drove an hour away to see the last few minutes of the game!  Homedale won!  Shoot...That then put us out of the tournament...had Emma's team won they would have played 2 more games!  Crazy!  A lot of hard, intense games for one day!  So they didn't place but still because of the excitement of all the games they felt good about how it had ended. 
Mr. Alek had 3 games.  Single elimination.  His team won the tournament with some exciting games too, most were games where they came from behind.
Miss Claire had 2 games and was excited about her season.  She improved a lot this year and really came to love basketball.  She played point guard and I think enjoyed that position a lot!  


So last Saturday we just didn't know what to do with ourselves, no games!  Rick decided to take Alek and Kade camping Friday night.  They called me Saturday morning asking if I would let them in the locked house.  They got snowed on and it was still snowing!  A little cold!  But the boys still had a great time and came home smelling like campfire.  


Lest you think we are bored...Soccer started for Emma this week and the triplets and Hannah began Tennis....no one is sitting around here with nothing to do...


February 10, 2011

Turning Paper Piles into Files - Organizing

Farmer's Dozen - Paper Piles
Along with 10 children comes piles and piles of paper!  Every day the kids come home with backpacks full of papers, there are forms to sign, mail that comes in, newspapers, bills to pay, schedules to organize.  With the busyness of the day it is often hard to find time to go through it all immediately.  Organizing paperwork is really an easy process if kept up on, decluttering your counter, categorizing the paper and creating a place for everything.  Three easy steps.  This is what I do to organize my paper piles daily.


1.  First I gather "ALL" papers in the house, big and small, into one pile, so it is all in one place.  I usually go through this current paper pile in the morning.  I divide the paper into piles of "like" topics, examples; school, calendar, "my lists", announcements, coupons, bills, scouting, church calling, garbage...etc.  I don't make many decisions at this point except if I know I can throw it away.  The reason for doing this is so you don't have to deal with the same papers over and over, putting it into a pile repeatedly and then repeatedly looking through the same pile.
Farmer's Dozen - Calendar
2.  I then enter the calendar items on to the calendar.  I often say, "If it is not on the calendar, it is not going to happen!"  In the past I color coded my calendar, a color for each child and a color for the family.  I have also used the large desk calendars, but I like the 8 1/2"x11" calendars because I can take it with me.  I have also used "Planners", but right now, this is what works.  


3.  After entering all the calendar items on to the calendar, I place those loose papers into a "calendar file", so that I can refer back to these papers if I need to.  
Farmer's Dozen - Daily Schedule
Each day there is so much going on, I write that days schedule out on a separate piece of paper.  By writing it out on a separate piece of paper, I can figure out visually how it will all work since I can see it in chronological order on the paper!  I sometimes need to duplicate the schedule for other drivers, and have even emailed the schedule to grandma, uncle, triplet drivers, Rick and I, to get all drivers on the same page!   


4.  I take the remaining sorted piles and make a file folder for each of them, categorizing everything based on the variety of subjects.  Placing the piles into file folders by subjects listed on the tabs. I just go crazy with all the papers in one huge messy pile, so organizing the papers by topics, even if it is only one paper per file folder, gives the paper a place to be so that I can relocate it when I need it.  For example, Drivers Ed papers, School Papers, Bills, Wedding Announcements, Instructions...anything.
Farmer's Dozen - Files
The above files are school papers.  I have each child's grades gathered in a folder, kindergarten to current.  I also have the child's school papers in a file.  Any awards, important information to keep, transcripts, test results etc. are in this folder.  I am currently doing college applications, and filling out scholarships so these items are being organized.  In a separate drawer which is easily accessible, I also have a file for each child that is for their current school papers.  It has the teachers weekly letters, spelling lists, school letters, information applicable for the current year.  This helps so that we can locate homework or a spelling list quickly for that child, rather than going through piles of papers to find it.  


Incoming bills begin in the daily gathered paper pile, then when I sort the daily collection of papers by topics, I place the bills in a "Bill/receipt" pile, I can then go through that file later and put them in their individual file ie: dentist, insurance, taxes etc...
Farmer's Dozen - Files
Above is another example of files, I use files over and over.  The front 3 inches or so are files upside down that are empty and ready to be reused!  These files are usually a temporary storage place for papers, making it easier to find the papers when needed.  This gives them an immediate place to be until they need to be dealt with.  This is not pretty by any means, but helps me to locate items quickly when they are needed.
Farmer's Dozen - Files
The above picture showing that I reuse the file folders repeatedly.
Farmer's Dozen - Files
More examples of files.  Every piece of paper can be gathered into a file for easy access when the papers are needed.  By doing this daily, I don't have to make the decisions on what to do with each piece of paper other than if I know it can be thrown out or not.  This can just take a few minutes, where if you keep paper in a pile to be dealt with "later" , those minutes will turn into hours of paper filing and you are forced to reread and sort through your old paperwork often.  Deal with paperwork immediately or at least daily.
Farmer's Dozen - Post It's 
I love post-its and use them often.  I have them all over my house.  I am a list maker.  I think of things and have to write it down to clear my head.  I have them by my bed so in the middle of the night I can write down things that come to my mind.
Farmer's Dozen - Notes on hand
I have also written things down on my hand if unable to find post-its in the middle of the night.  This was to remind me to turn the oven on for the cinnamon rolls I was going to cook in the morning.  My need for notes and lists also could be because of my age since I can not remember things for longer than seconds.  This is my way of dealing with the piles of papers that come into my home to keep it manageable and useful.  What do you do?


Visit shabbyfarmer.com to see decorating ideas.


You can contact me at farmer.laurie@gmail.com or on facebook or on twitter


February 8, 2011

Rapunzel, Rapunzel, let down your hair...hairstyle #6

Similar to hairstyle #5.  With this hairstyle, part the hair in half, then into about 2 1/2 inch sections on the right and left of the part on the top of the head.  Starting with the right side, top section, divide it into a square section and begin twisting until there is a little "bump", then divide the next area into another square and begin twisting it adding the first section of hair until it has another little bump...then on to the third section twist it all together into one strand.  Continue twisting toward the back of the head and gather with a claw while you repeat the process on the left side of the head.
Take the two twisted sections and add it to the remaining hair forming a ponytail at the back of the head.  Join it in  a rubber band.  
This bun was formed by dividing the pony tail hair in half and twisting each side separately, the same direction, then joining the two sections going the opposite direction (a twist) then wrapping that loosely into a bun which is gathered with clear rubber bands and a ribbon tied around it.  
Love it!


Visit shabbyfarmer.com to see what to do with your "junk".

You can contact me at farmer.laurie@gmail.com or on facebook or twitter